Advice and answers from the ScanUnlimited Team
After uploading a large file to be scanned, Scan Unlimited will return LOTS of data for you to analyze so that you can make the best sourcing decisions. Filtering your scans will allow you to dig through the results efficiently.
Navigating to the Filter Sidenav Menu
To get to the filters sidenav menu, open a previously run scan and click the “filters” button in the top right hand corner.
Types of Filters
Each column within a scan can either be 1 of 3 column types, number, string, or boolean.
A number column, such as Sales Rank, allows the following logical comparisons:
- Greater Than
- Less Than
- Equal
- Not Equal
- Less Than Or Equal
- Greater Than Or Equal
A string column, such as Title, allows the following logical comparisons:
- Contains
- Equals
- Does Not Contain
- Not Equals
A boolean column, such as Amazon column, allows the following logical comparisons:
- True
- False
Apply a Filter
To apply a filter, click a column in the sidenav to expand the dropdown and add a filter argument. Filter arguments have a logical comparison (eg. Less Than) and a value to evaluate against. Click the add button to submit the filter to be applied to the scan.
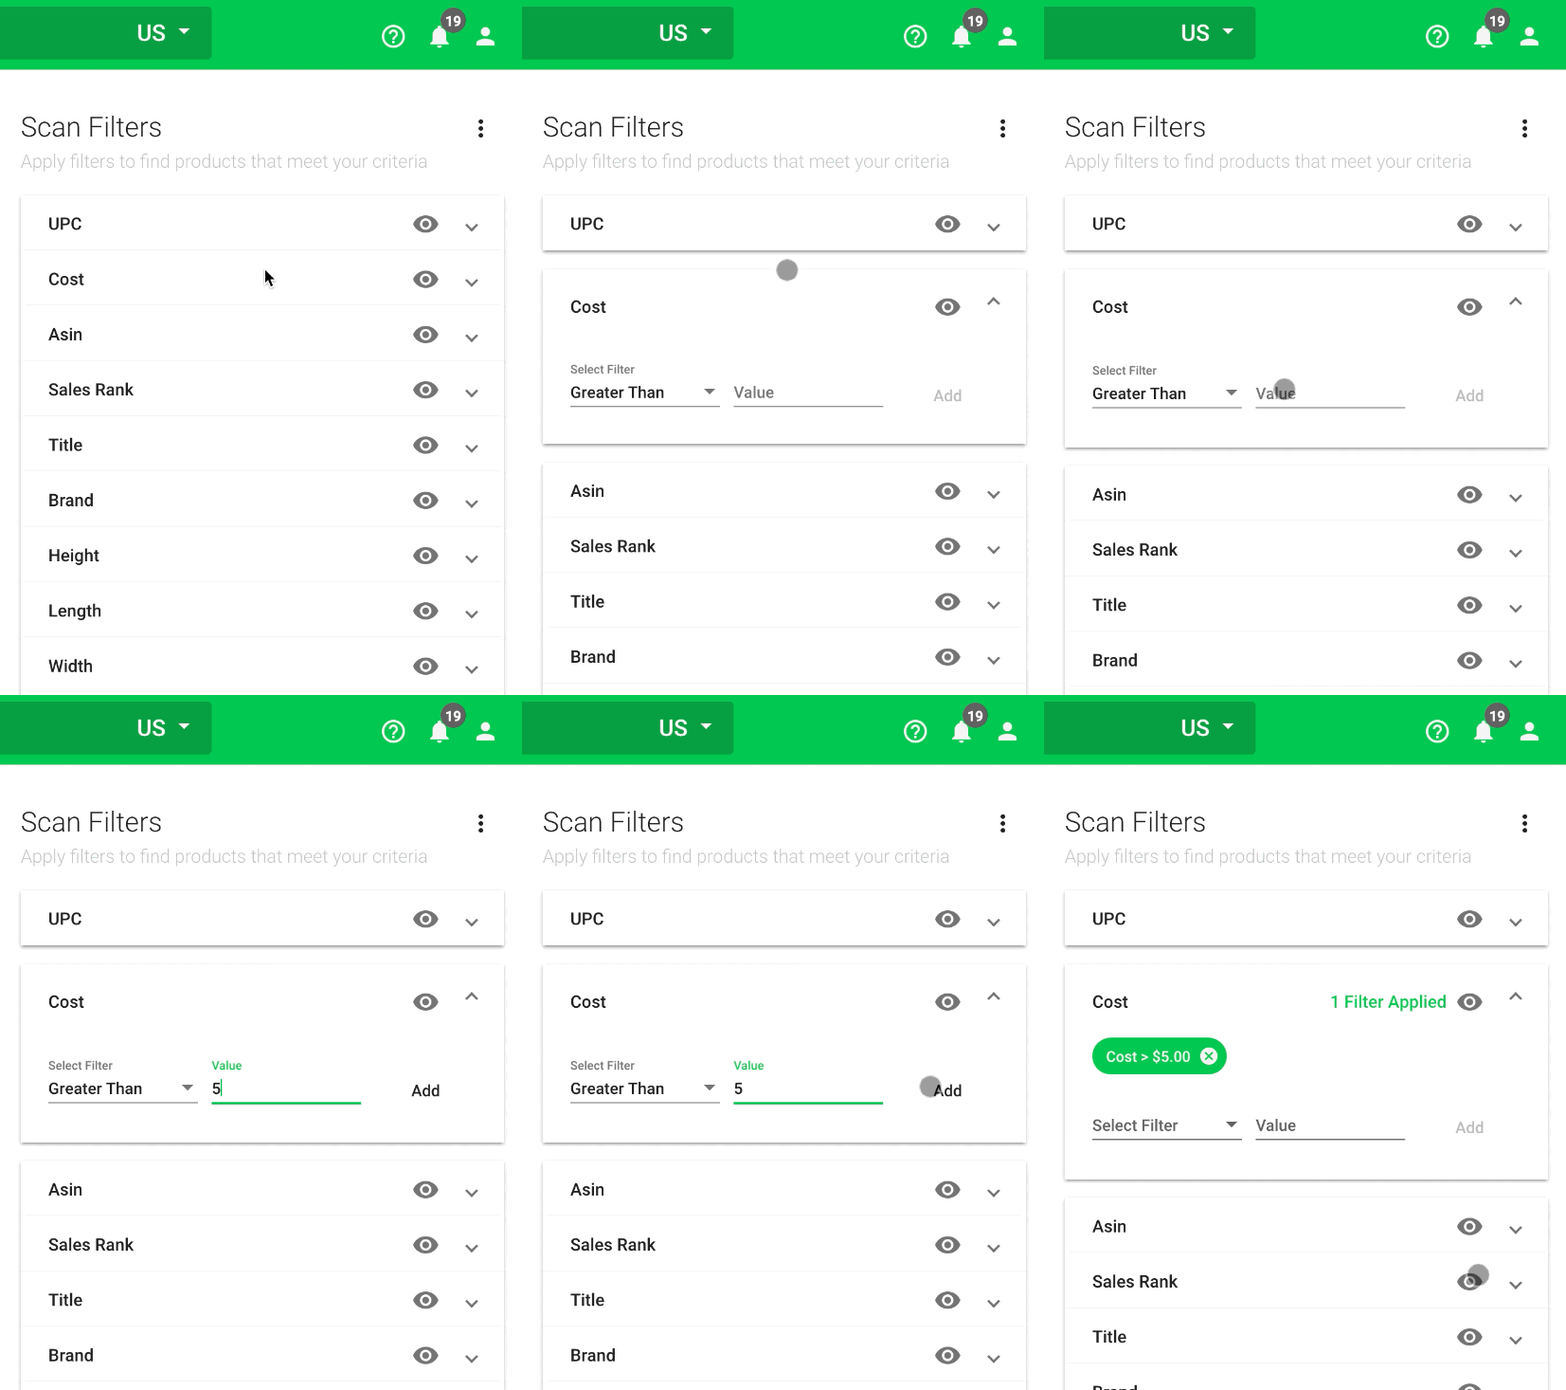
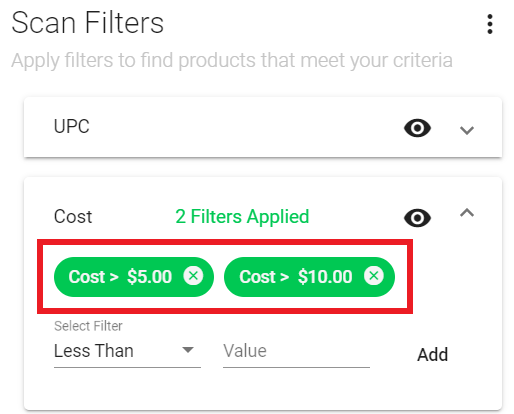
Note: If a column has more than one filter applied, the filters will layer on top of each other (eg. cost > 5 AND cost < 10).
Filters applied are denoted by the green chips that appear.
Apply Filter Using the Filter Dropdown Shortcut
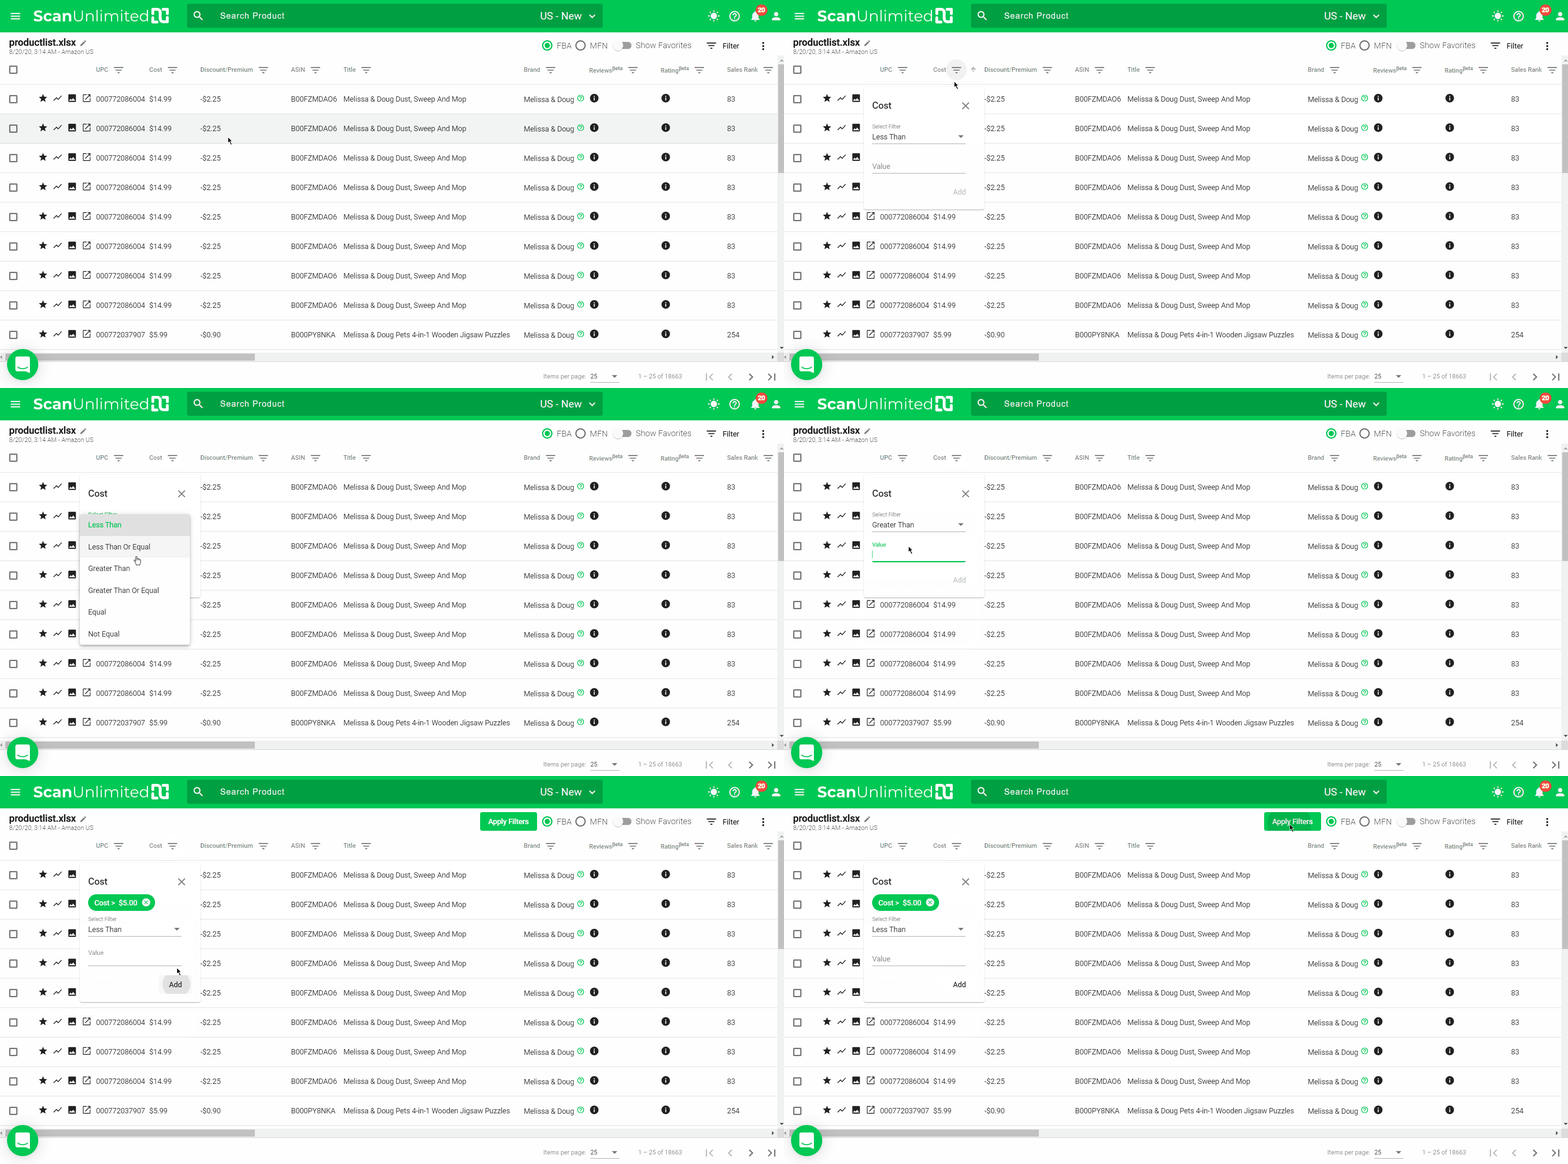
If you would like to quickly apply a filter to just 1 column, using the filter shortcut can prove to be a convenient option.
To add a filter via the shortcut, simply click the small menu icon to the right of the column header. This will reveal a dropdown and give you the opportunity to add/remove a filter.
Click “Apply Filters” button to apply the filter to your scan.
Remove a Filter
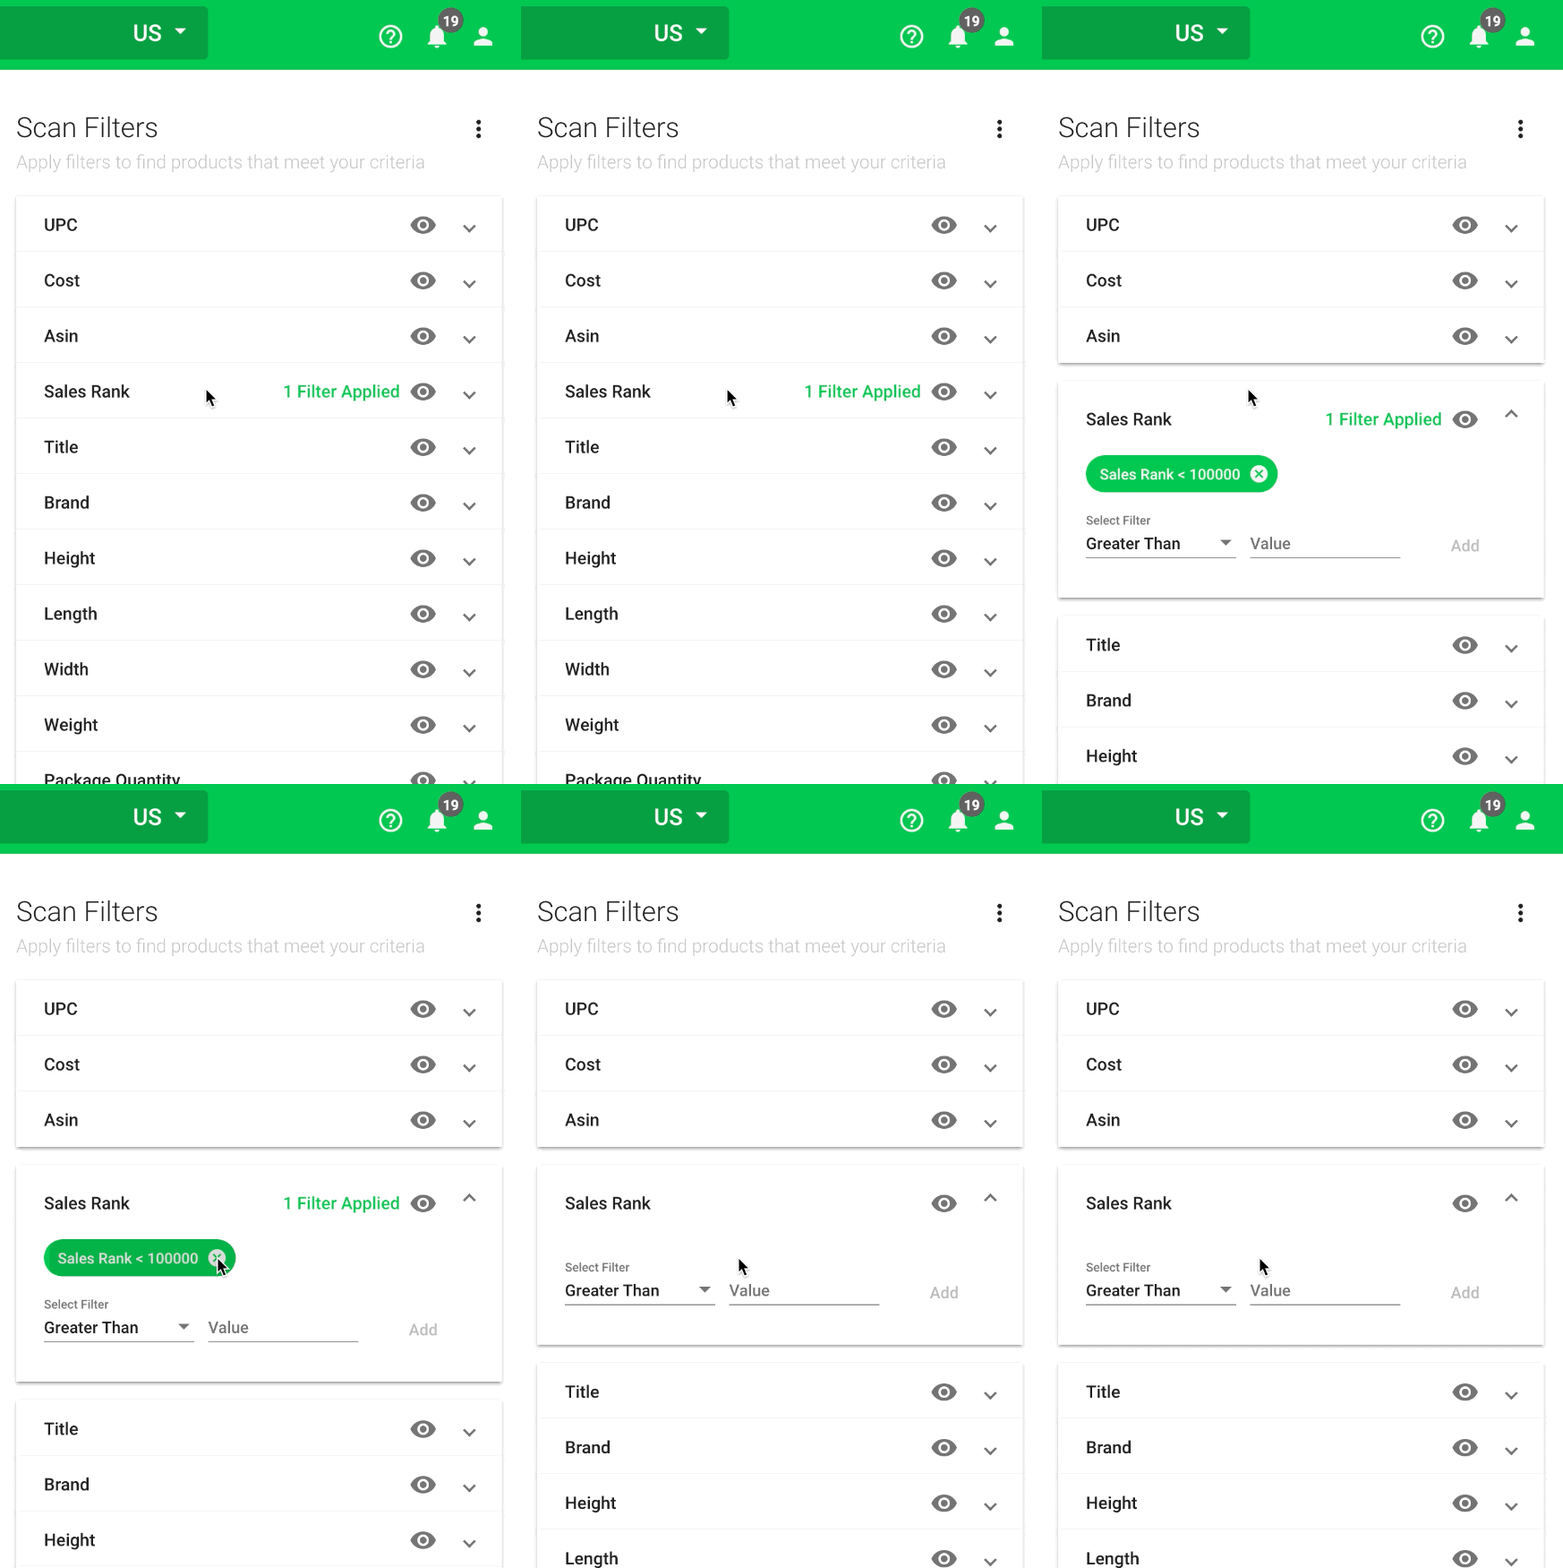
If you would like to remove a specific filter applied, simply click the small x on the filter chip.
Clear Filters
If you need to clear all filters, you can quickly remove all filters applied by clicking the options icon in the top right corner in the filters sidenav menu and selecting “Clear”.
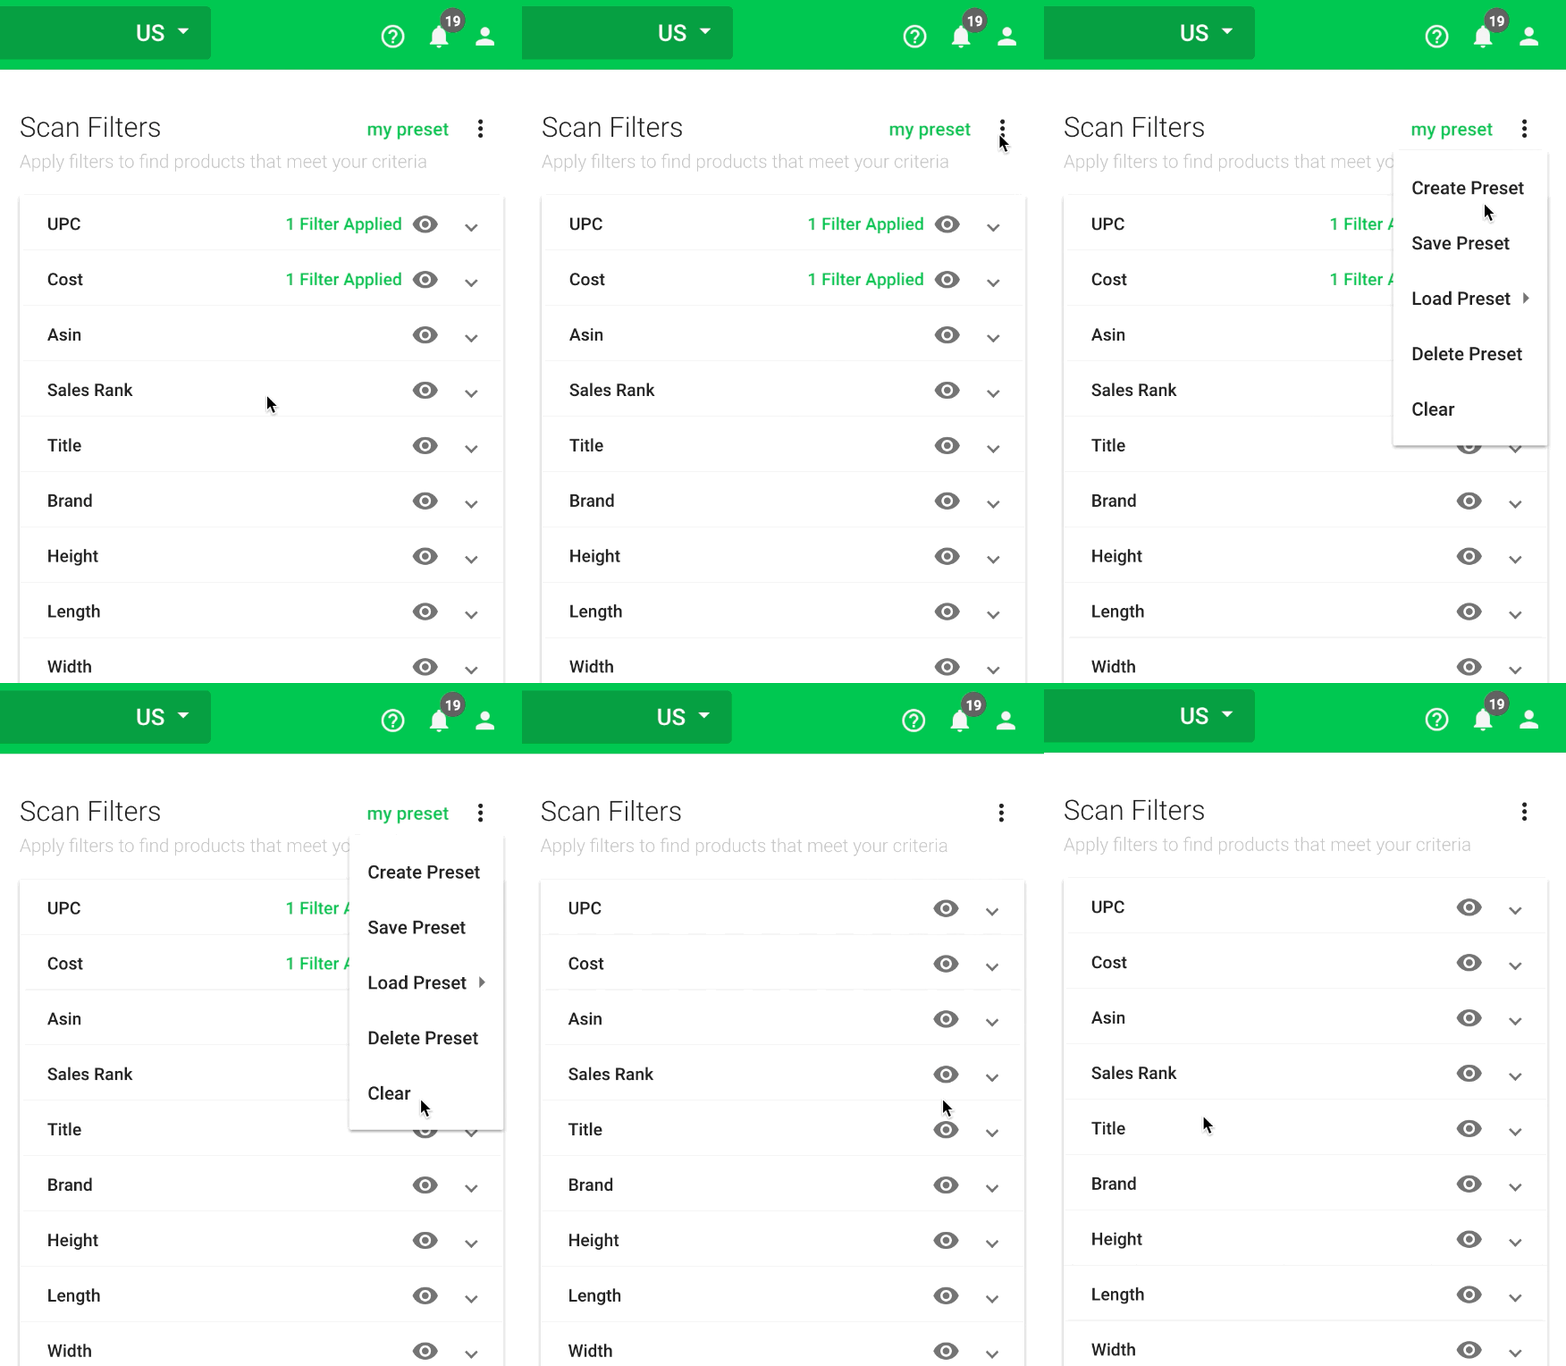
You can also apply filter presets to your scan. Click here to learn more about applying presets.