Creating a LinkedIn ad using PixelMe
To get started with your first PixelMe based LinkedIn ad, you first need to set up your LinkedIn pixel, create some links, and give them a few days to gather clicks. Once that’s done, you can continue here.
Step 1: Create the audience.
Navigate to your ‘Matched audiences’ in the ‘Account Assets’ menu.

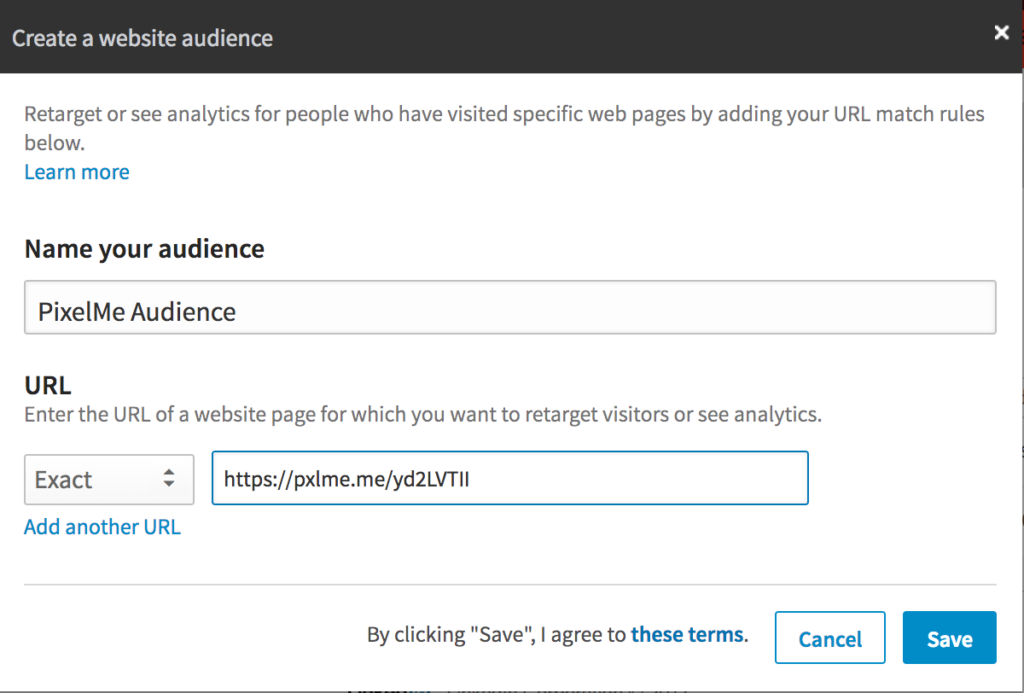
Press the ‘Create Audience’ button on the right hand side. In the modal window that pops up, you can set the parameters for your new custom audience.
Give your audience a name, then choose one of two options: either, set your audience to only include people who clicked on specific links. You can include multiple URLs if you’d like.

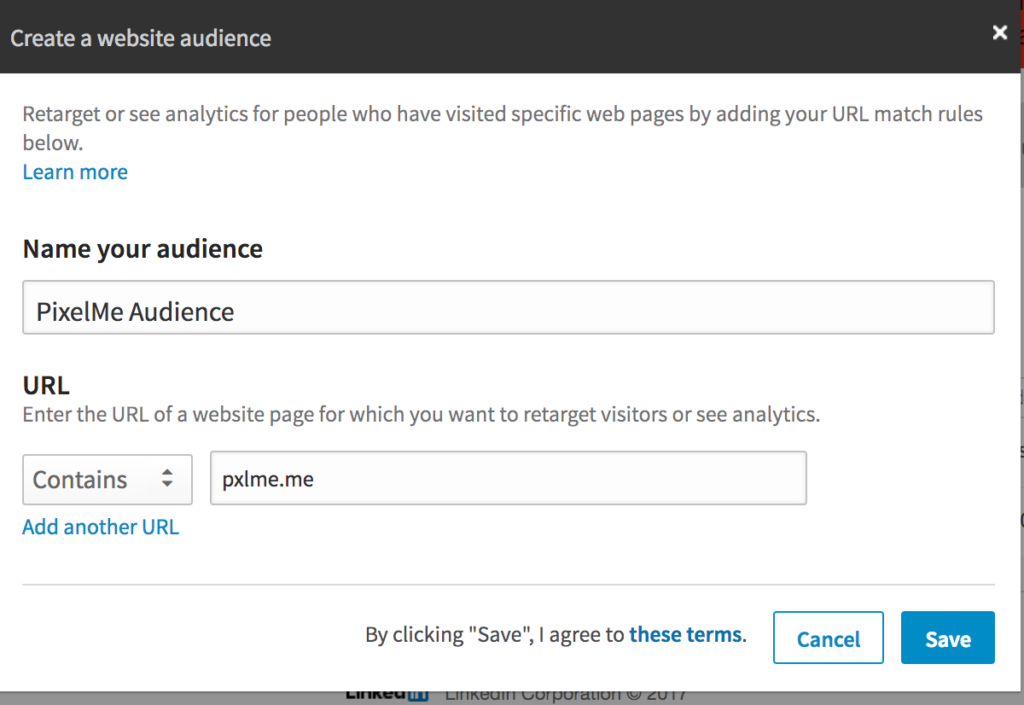
OR, you can select your entire PixelMe audience by setting the URL parameter to ‘Contains’ and ‘pxlme.me’.

Save your audience.
Step 2: Select your audience.
Once you’ve created your audience, you can click on ‘Create campaign’ in the right hand corner of the page. Give it a name, and set your objective.
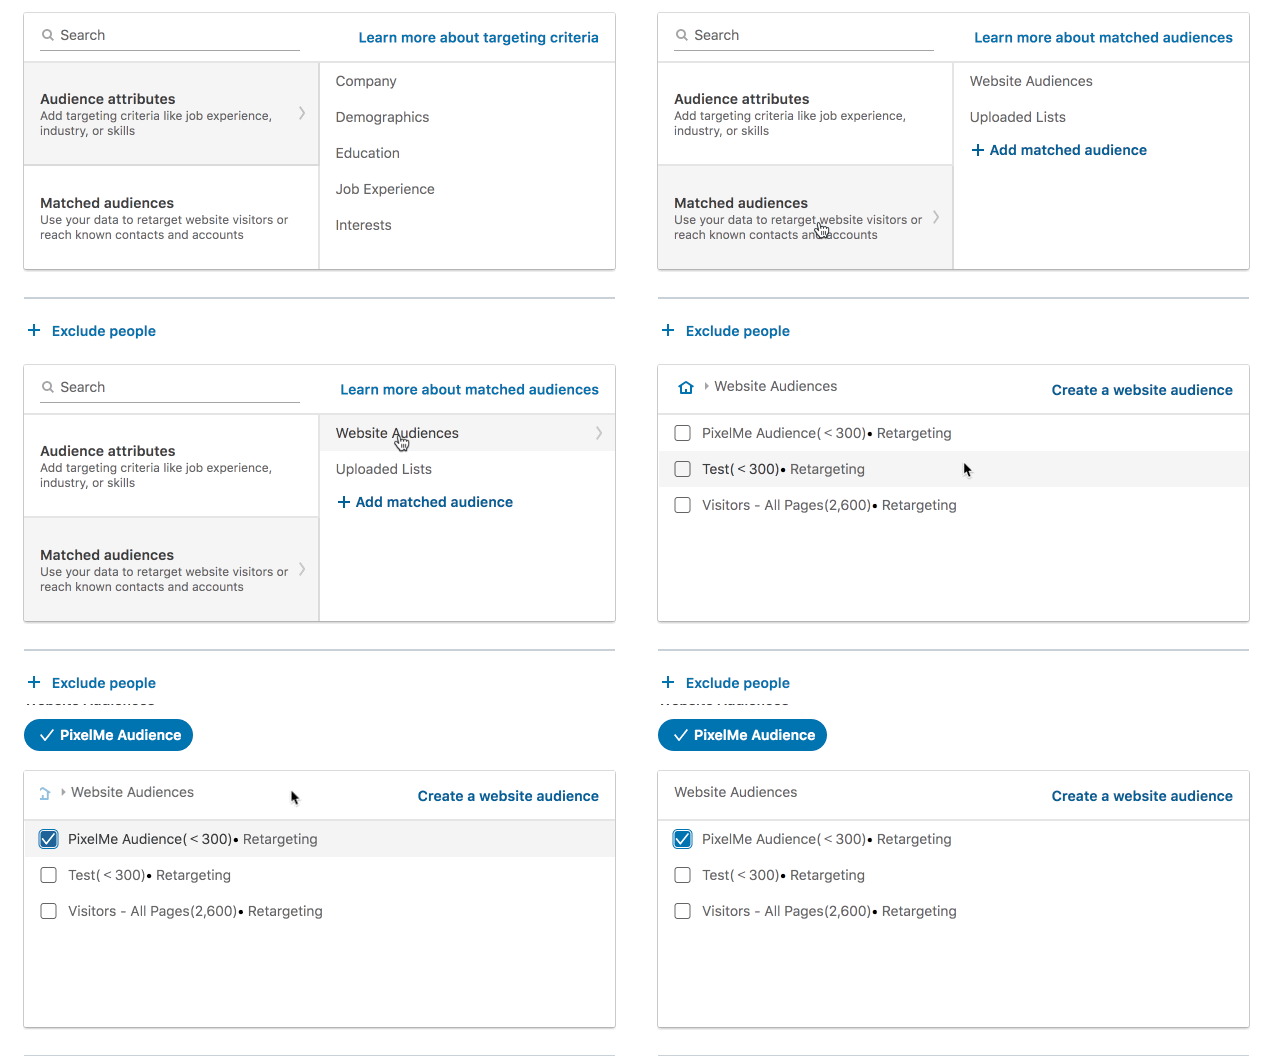
In the Audience section, click on Match audiences -> Website audiences -> the audience you just created. Press save on your audience.

Step 3: Finish your ad and post!
Continue setting up your ad with the setting you want. Once it’s ready, you can launch your first retargeting ad! ✨
Not a PixelMe user yet? 👉 Try PixelMe for free, the URL shortener for savvy marketers! Turn every link you share into perfectly targeted ads. 🚀